In this tutorial, we explain how you can easily install WordPress on your website under 5 minutes. To do so, we guide you through the steps to install WordPress using Softaculous through cPanel. cPanel and Softaculous are available on HostPapa, which is the most popular web host used by our visitors.
If you’re in need of a reliable web host at an affordable price, sign up for HostPapa.ca with the coupon below. Then follow the steps of the Tutorial located right after to install WordPress.
Why Should You Use WordPress?
If you’ve been creating websites or blogging for a while, you don’t really need me to highlight the virtues of WordPress. However, for those of you who are new to this versatile self-hosting CMS, here are some important advantages to be aware of before you install it:
- It’s incredibly easy to use. Many of the features on WordPress require minimal technical ability to operate and most allow for quick mastery.
- As a self-hosting blogger, you will get to choose your own domain name in lieu of a sub-domain name. For example, you get to have www.example.com versus www.example.blogspot.com.
- It has tons of different plugins and themes available for you to customize your site.
- Frequent automatic backups so you don’t have to worry about forgetting to save your work.
- Options are available, as a developer, for you to create your own plugins, themes and software.
- It provides quality spam protection so you don’t bogged down by unnecessary junk.
- Search engines love it. WordPress is great for SEO use via its self ping feature, which “pings” multiple search engines every time the blog is updated.
- Best of all, as an open-source platform WordPress is totally free!
Installing WordPress with Softaculous and CPanel
Now that you’re all fired up about using WordPress, it’s time to discuss how to install the program. If you have a hosting site like HostPapa that uses cPanel, chances are you will also have Softaculous at your disposal. These two programs provide a quick way to install your WordPress blog or site:
- Login to cPanel – usually accomplished by typing in the URL of the hosting site followed by a forward slash (/) and the word “cpanel” – i.e. www.example.com/cpanel – Enter your cpanel username and password, and then click to Login.
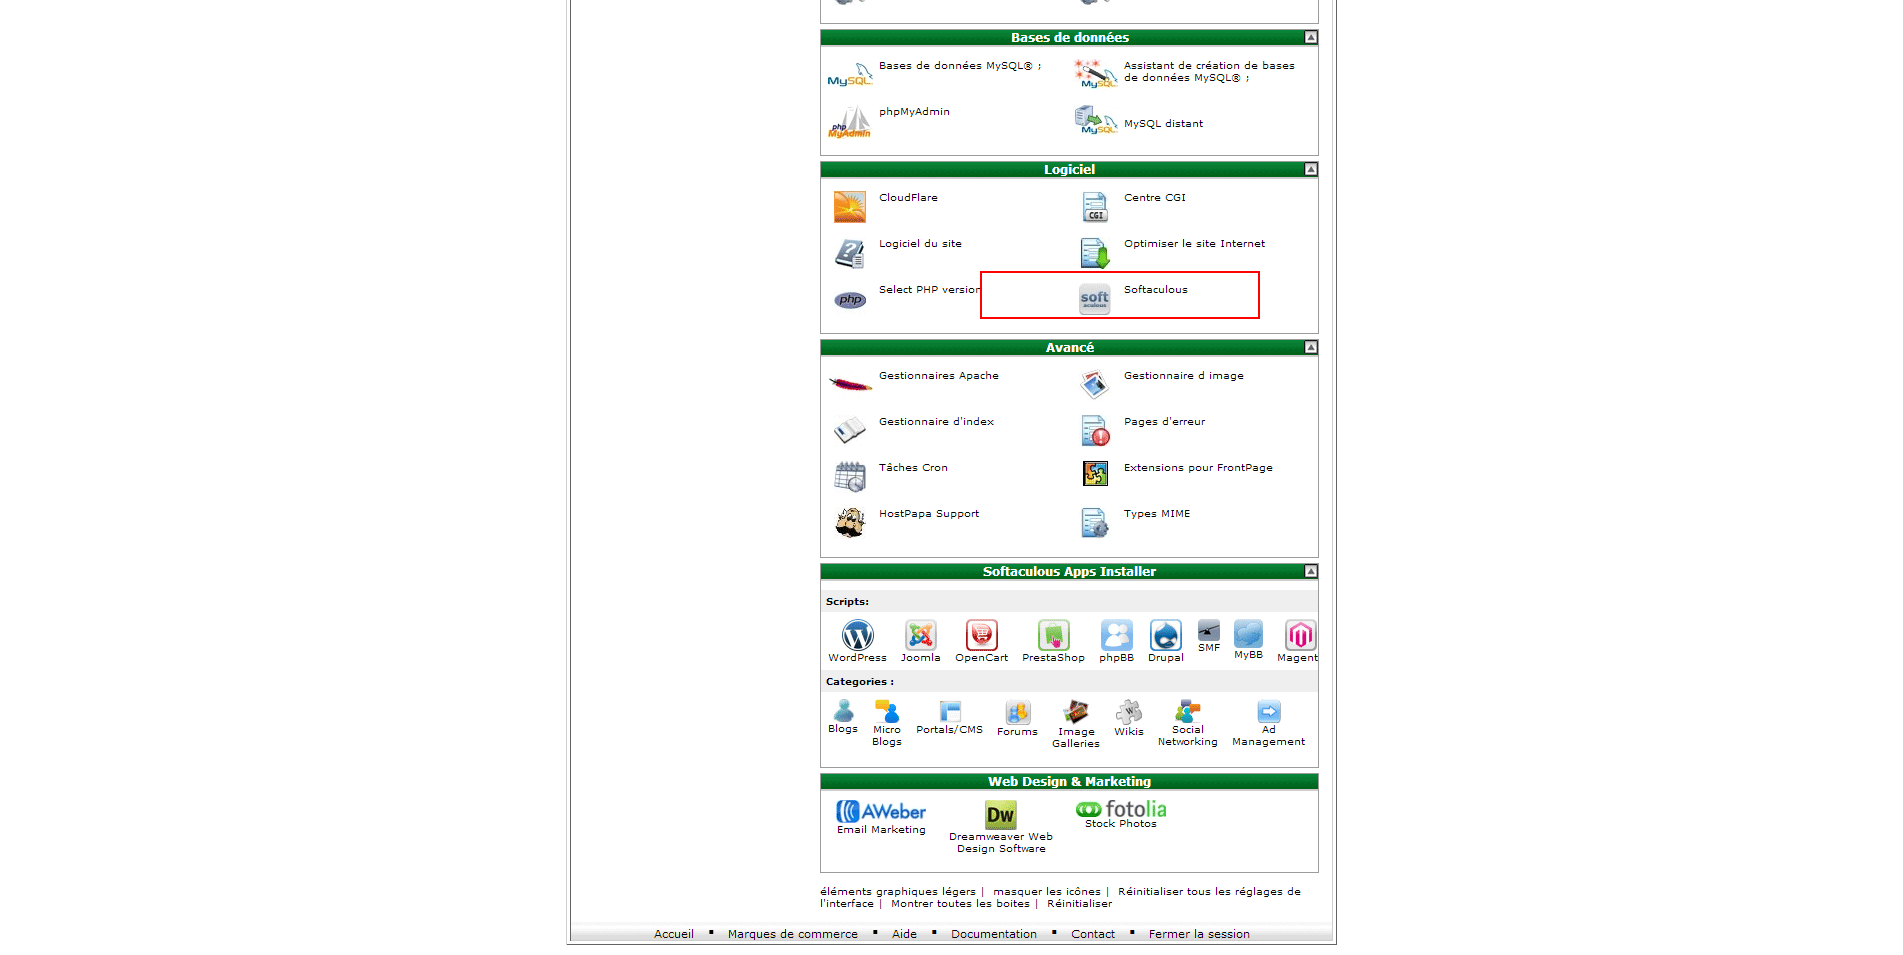
- Scroll down until you see the title “Softaculous Apps Installer” and then select WordPress from the display screen and double-click to open.
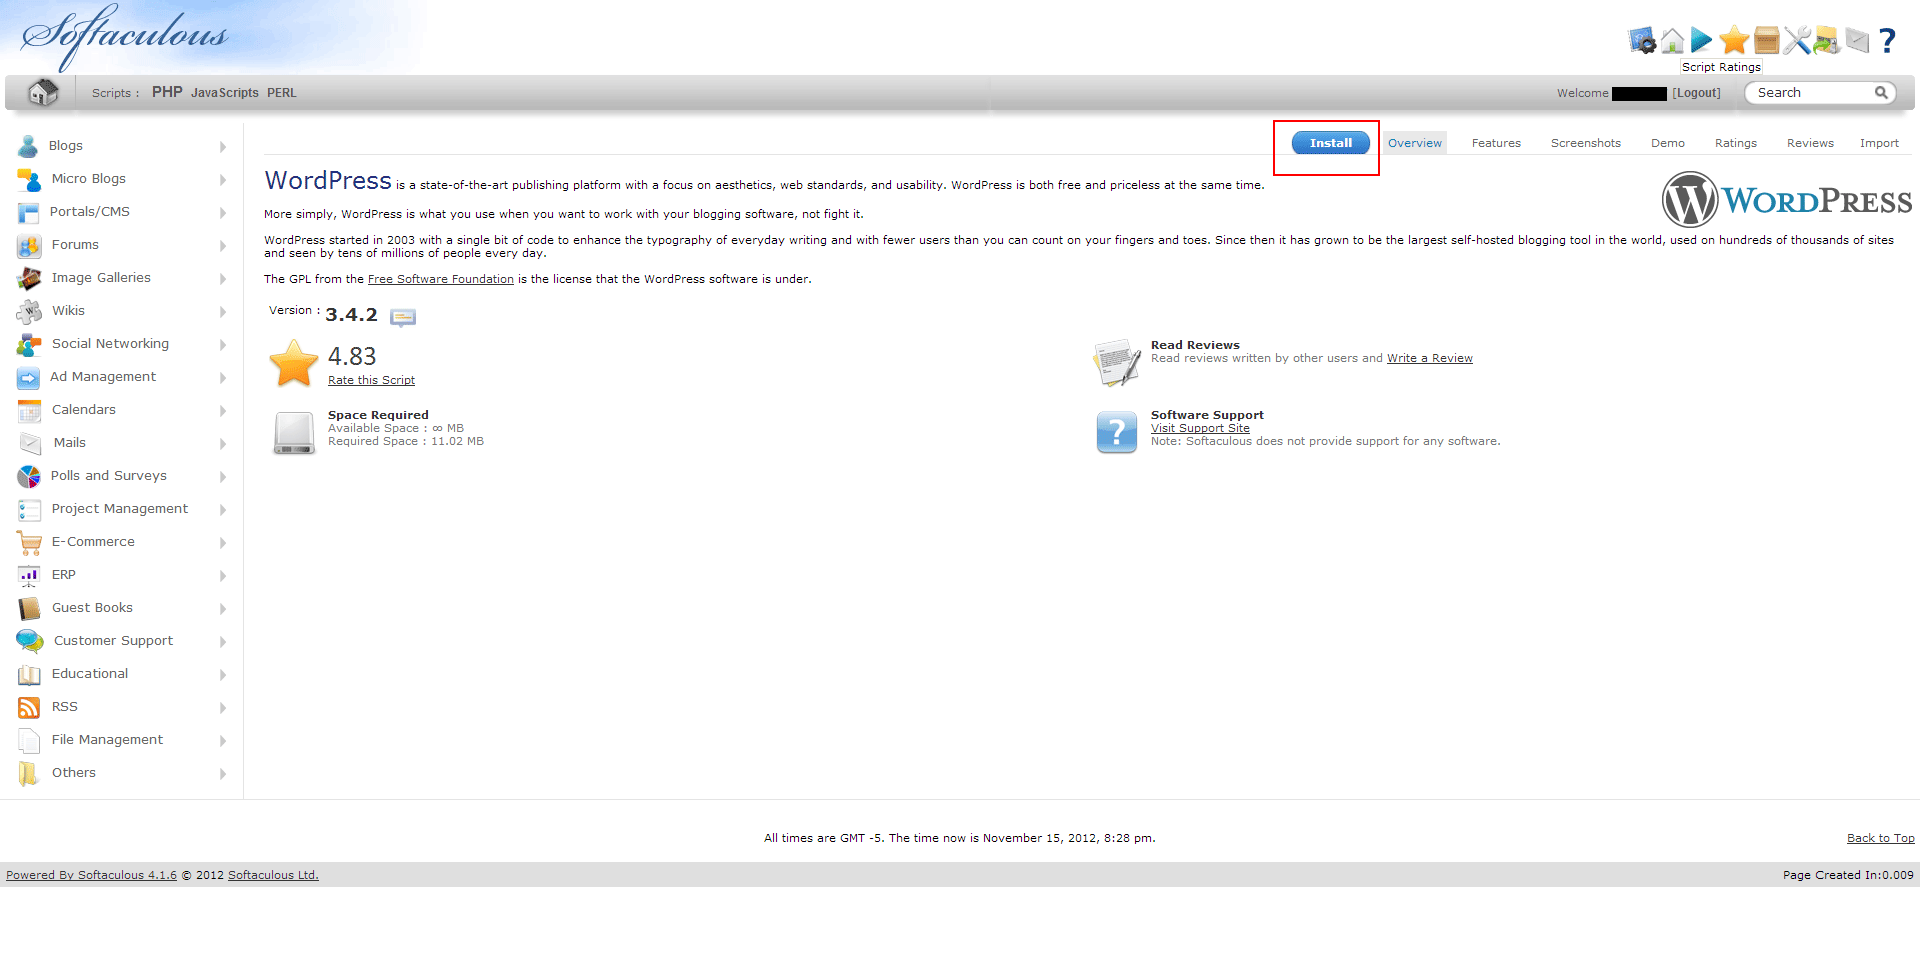
- From the Softaculous WordPress page, select Install to begin the installation process.
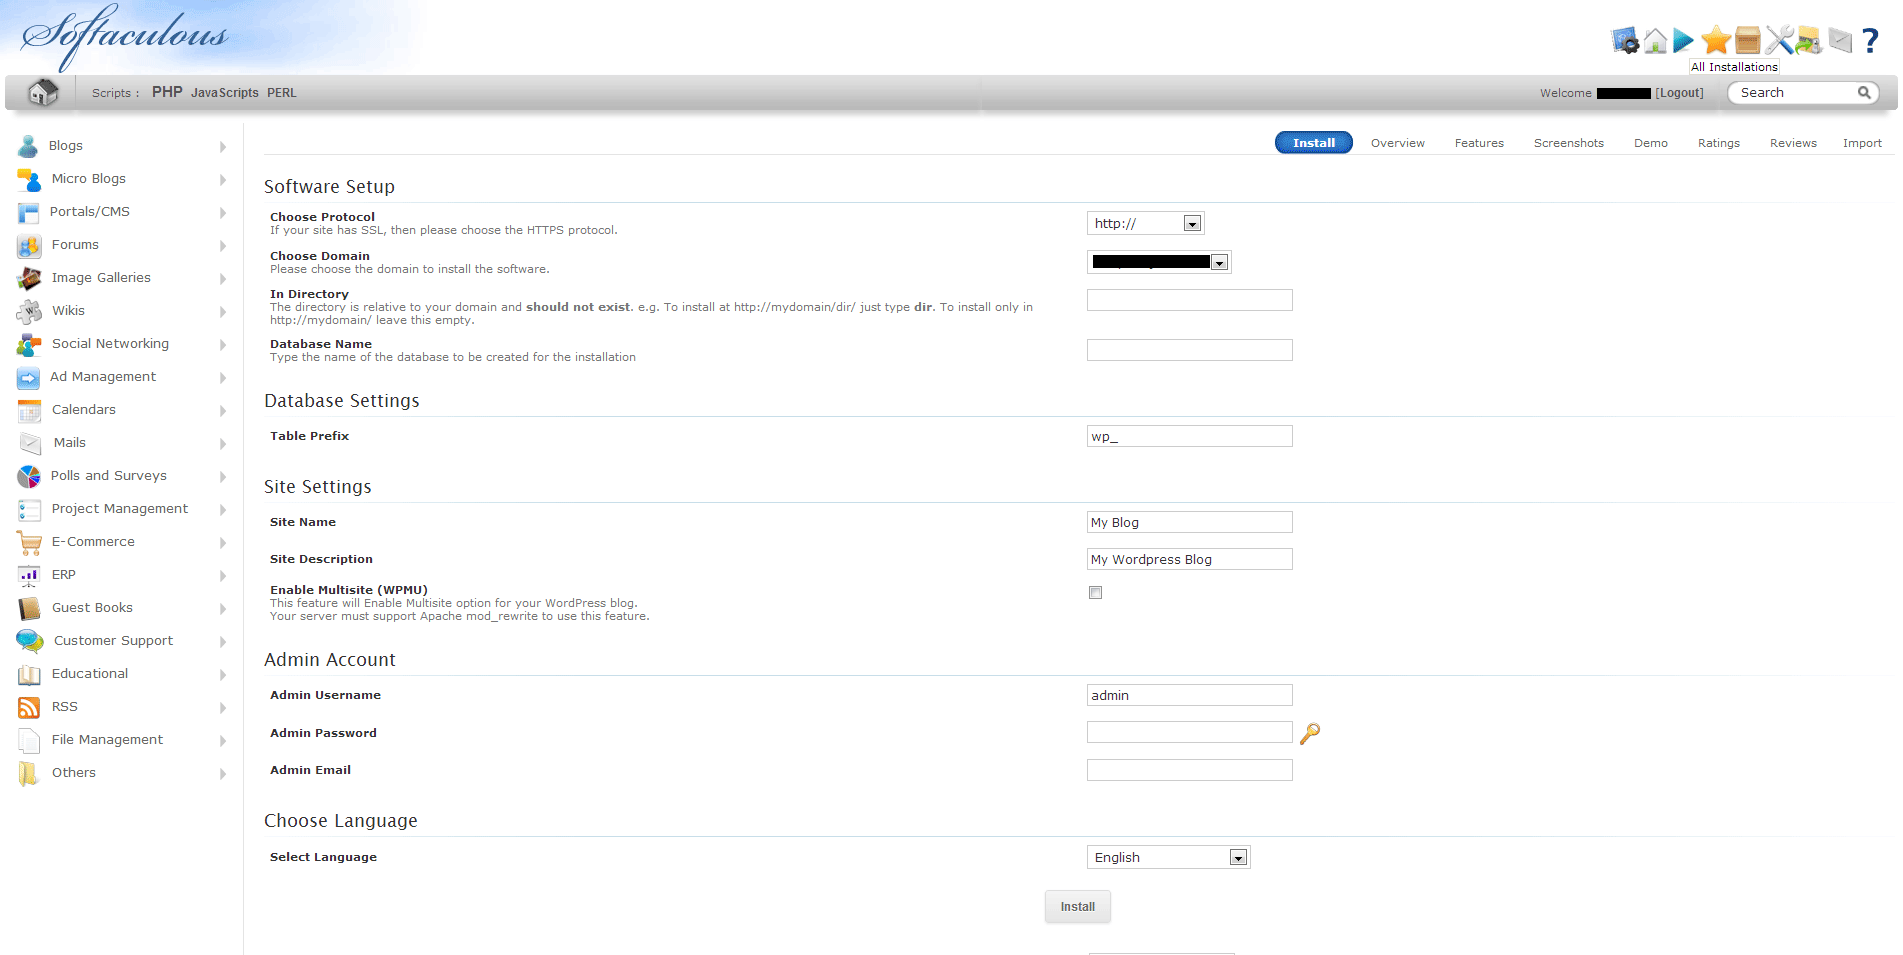
- Fill in the following simple form:
– Choose Protocol – only choose “https” if you plan on installing a SSL certificate, otherwise choose “http”.
– Choose Domain – use your chosen WordPress domain name.
– In Directory – if your blog is only thing that’s going to be on the site, just leave this area blank. Otherwise, it’s recommended to place a blog in its own directory location.
– Database Name – the name to be given to your database (a name will be entered by default usually).
– Table Prefix – the prefix for the entries in your database (by default “wp_”).
– Site Name – the name of your new site (it can be changed later).
– Site Description – the description of your new site (it can be changed later).
– Enable Multisite (WPMU) – to enable the Multisite option of WordPress (if you want to install multiple blogs on one WordPress installation).
– Admin Username – enter your username to access your site, write it down.
– Admin Password – enter your password to access your site, write it down.
– Admin Email – enter your e-mail address.
– Select Language – select the language of your new site. - Click on “Install“.
- Check over the display screen that follows. If everything went well, you will a confirmation message “Congratulations, the software was installed successfully”.
Now, all that’s left to do is login to WordPress and customize your themes, plugins and layout options. You can login into your WordPress admin panel, through www.example.com/wp-admin – and, if you just can’t wait any longer, go ahead and start writing your first blog post or page.


 (416) 421-3178


Thanks v much for these instructions.
I still couldn’t get my multisite to work so asked Hostpapa for help. They advised that the .htaccess file permissions have to be set to 0644 which fixed it.
So in filezilla, find the .htaccess file, right click then enter 0644 where it says permissions.
cheers